Pages

Showing posts with label baking. Show all posts

Thursday, 7 November 2013

Rainbow Party (part three)

Months ago I decided a Rainbow themed Party was the go for my daughters 1st birthday.
With that sorted, I started to think about what food I would like to have!

It was fun researching food ideas for rainbow parties and seeing what others had done. Pinterest was where it was at! So many fantastic ideas.
My husband thought I was a little obsessed, but hey, when have I ever got to host a 1st birthday party, let alone my own daughters!!!! He got over that when it came to party time and got to eat all the yummy food I'd prepared.

The party was a shared BBQ lunch followed by a Rainbow afternoon tea which was done by yours truly. It was a flippin mission doing it all, but luckily I had my sisters to watch my daughter so I spent most of the day prior to the party frantically baking! We got there in the end.

Check out the Rainbow spread and enjoy :)
Much love,
Kate


Truffles were made by my sister in law and they were to die for!!!!
Fruit kebabs with pinapple, green and red grapes and strawberries.
 Vanilla cupcakes iced with butter cream icing and coloured with food colouring gels.
 Bowls of Cadbury drops, Pebbles and Skittles
 Cake pops using my trusty chocolate cake recipe (found here), iced in white chocolate and coloured with food colouring and finished off with hundreds and thousands.
Rainbow Jelly in cups (Let's not get into how hard that was)
 The cake!
 That moment, when you cut into it and you find that it actually worked! A beautiful Butter cake made up of 6 layers using food colouring gels, iced with cream cheese icing between the layers and covered with lemon icing.
Me with my creation.
The birthday girls seal of approval :)

Tuesday, 15 October 2013

Cake Pop Cake

This is the cake I made for Mim's sons 13th birthday. I'm kinda obsessed with cake pops at the moment, they're potentially my new fav thing... I mean, cake. on a stick. covered in chocolate... with sprinkles! Hello heaven!

I was keen to give this cake pop cake a go, and for a first attempt it wasn't too shabby!


 First I pre made cake pops using my fabulous cake pop mould that I showed you in my cake pop galore post (see here). These are made from a basic vanilla cake recipe found on the chelsea sugar website... my go to recipe guide.

I lined the bottom of the tin with baking paper and also sprayed with cooking spray to ensure nothing would stick, you can't be too careful! By this stage I had also pre made the chocolate cake mixture using the same chocolate cake recipe I used for the cake pops, see the link above.

Pour half the mixture into the tin then place the cake pops in mixture. Pour the remaining mixture on top so the cake pops are well covered. Then bake for appropriate amount of time. This cake required 50 mins at 180 degrees.

Fresh out of the oven. Note I made two replica chocolate cakes as i wanted a two tier birthday cake!


 The finished product! A mighty two tier chocolate cake held together with chocolate butter cream icing and completed with basic chocolate icing. Topped for four remaining cake pops iced with melted white chocolate and sprinkled with hundreds and thousands. 
I would say this cake is well and truly fit for a 13 year old boy!

 The big reveal, thank goodness it worked!!!


A perfect yellow cake pop. Yum!

On reflection. For anyone reading this thinking they would love it give this a try! Do! It's not actually that hard.
There are however a few things I would do differently next time I make this delicious treat.

1. When making the cake pops I would only choose the brightest colours to be included. The green and purple pops did not show up in the chocolate mixture.
2. I would possibly use the vanilla recipe or something similar as the main cake base as well, for two reasons; for the cake pops to really stand out and because for some reason the cake pops didn't sit very deep in the chocolate cake mixture and I wonder if that is because of the different densities.
3. If I attempt a two tier cake again I am going to invest in a cake leveler to take of the mound that naturally forms when the cake is cooked so that the 2 cakes sit flush against each other.

Let me know if you give this a go! I would love to hear how you got on.
Much love,
Kate

Saturday, 12 October 2013

13 Years, Whoop Whoop

So today my son turned 13!!!! I can't quite believe I have two teenagers in the house!!!!


We had such an awesome starting with a fantastic cake made by Kate (post coming soon about cake :). I whipped up a bunting/garland happy birthday sign, which I LOVE, and will totally use for the next birthday. Pretty simple using a background I had previously painted, cut into rectangles, draw on the letters, then fastened with some cool twine and mini pegs. We got ours from Typo, but you can pick them up at various $2 shops as well.


Our family, Kate's family, and his best mate spent the day together.

We went to two different skate parks, had fish and chips on marine parade in Napier, went to ocean spa for a hot swim and got to see some of the Indian festival, Dawali, at the sound shell.

Probably the highlight was at Sk8 zone in Napier landing his first ever back flip on his scooter. Check out the video.... How super cool is my boy.

We love him heaps, he is such a quirky, intelligent, funny, individual. God was awesome when he gave him to us :)
mim

Friday, 4 October 2013

Cake Pops Galore

You will soon discover that I am really into baking. It is my new hobby since the birth of my daughter and being a stay at home mum! I love trying new recipes and I won't lie, I love eating the stuff I bake. I've got a major sweet tooth. I blame my mum for that! What I love most though is baking for other people! Not only because I love to see them enjoying what I have created, but it also means I won't eat too much if I've given it away! Win win.

(just a note, you will notice that I love exclaimation marks. I have just re read what I have written and it sounds like I'm so excited lol. I will leave them there, but I warn you, I'm an over user of these things !!!!!)

My husband Jono is a youth worker and was having a leaders meeting with his team tonight, so I offered to do dessert for them. Jono loves anything chocolate, maybe even more so than me! So I thought I'd try out my new cake pop mold that he bought me as a gift for my birthday last week.

Chocolate Cake Pops... the world may have just gotten a little better... 

Check out the recipe I used and my how to, to make these delicious treats!
Kate


 Pre make your cake mix. You can use any cake recipe you like. I have used the Sophie Gray - Destitute Gourmet Chocolate Cake recipe. (Ingredients at the bottom. It is the best Chocolate Cake recipe I have ever used)


Using either a piping tool or a fancy contraption like this one to fill cake pop molds. It is so much better than using a spoon. And so much cleaner!


 Fill your cake pop molds with your cake mixture. Fill as close to the top of the bottom of the mold to ensure it takes on the shape of the mold.


Place the lid of the mold on and ensure it is sealed properly. Put in the oven for approx 20 mins. Use a cake tester to check if cooked. If it comes out clean you are a winner :)


 Once the cake is out of the oven leave in the mold to cool completely. This  will help the cake hold firm and not fall apart on you!


Once cake is cooled, transfer them to the top of the mold so you can add the lolly pop sticks to them without having to worry about them rolling around and getting ruined.
Dip the end of the lolly pop sticks in the dipping chocolate you are using for icing, this helps keep the sticks secure in the cake.

They will look a bit like this as you go.


Yay 5 down... none broken. Success!
 

 To ice your cake pops, I melted a bag of Nestle Milk Chocolate Melts in the microwave for about 90 seconds, stirring once. 
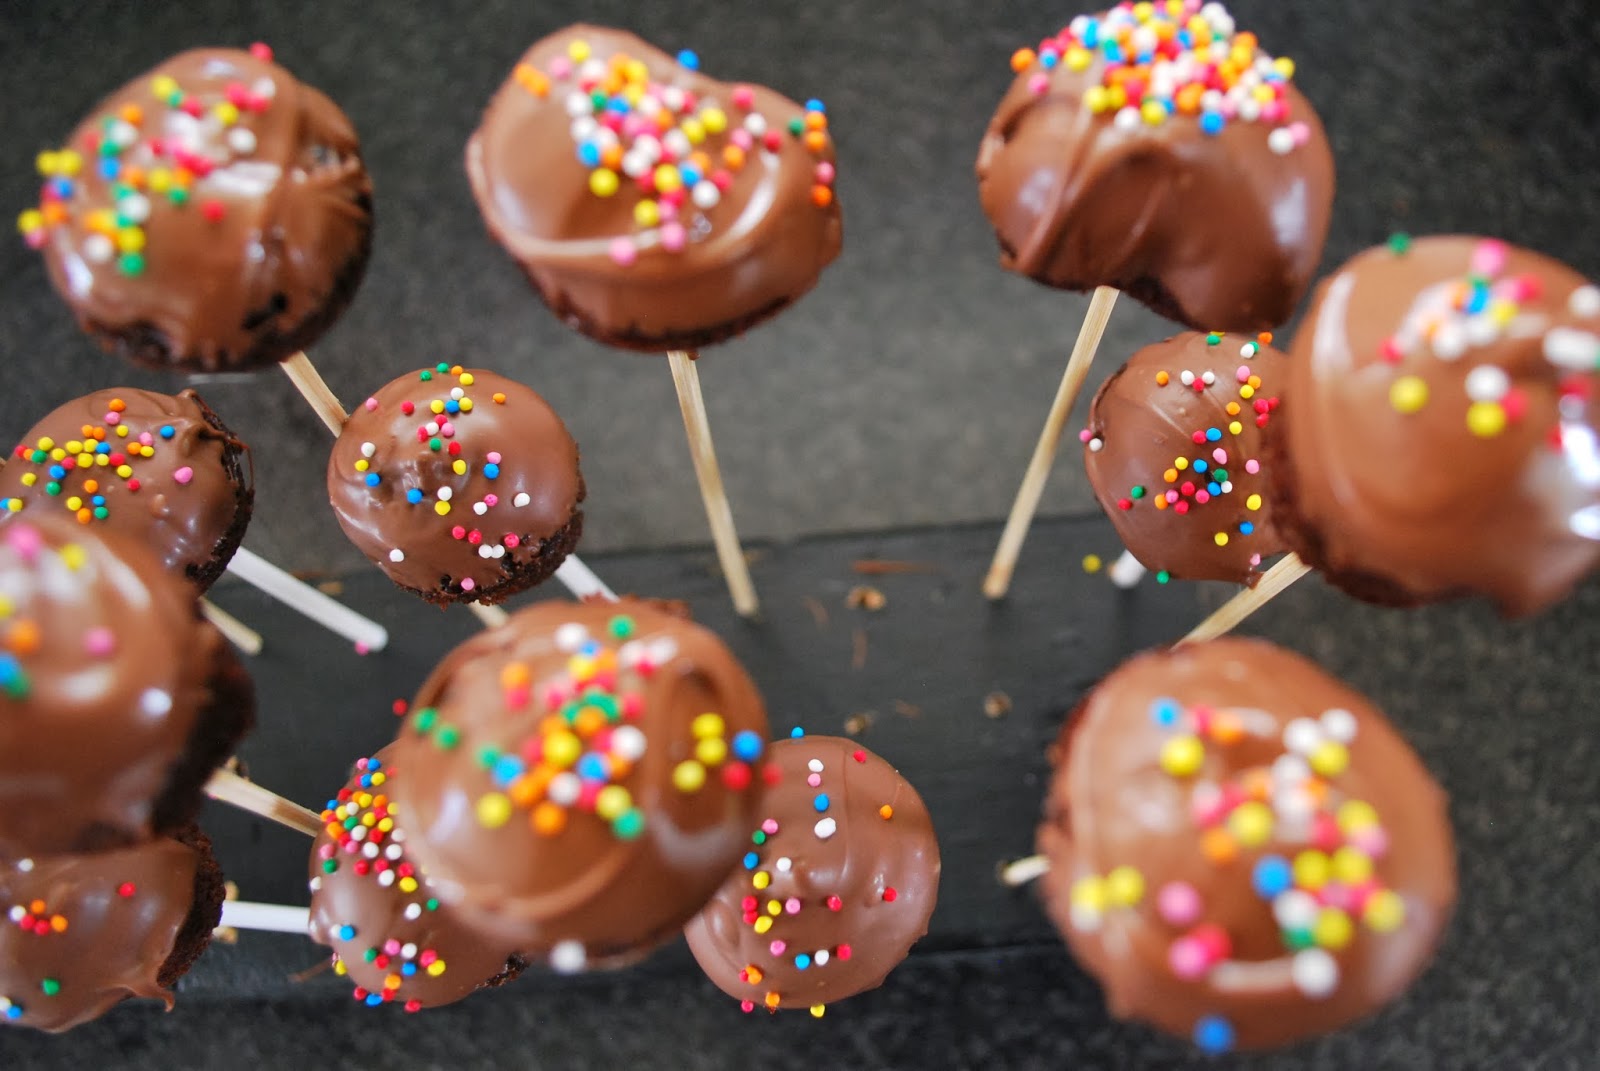
Hold the end of the lolly pop stick downward into the chocolate and dip to your hearts content. Once dipped place in a stand, add sprinkles and other decorative treats if you so desire and wait for them to harden.

The finished product! Jono whipped me up a sweet cake pop stand using a piece of 4x2 wood and drilling the appropriate sized holes in it. Having a stand means the chocolate won't go all deformed when hardening. It makes it so much easier to decorate and looks visually exciting when your guests arrive.

My little kitchen helper today.

Sophie Gray - Destitute Gourmet Chocolate Cake
  • 1  and 2/3 cups of flour
  • 1 and 1/2 cups sugar
  • 1 tsp salt
  • 100g butter, melted
  • 1 tsp vanilla essence
  • 1 and 1/2 tsp baking soda
  • 2/3 cup cocoa powder
  • 1 and 1/2 cups milk
  • 2 eggs
Pre-heat ove 180 degrees and grease 20cm loose-bottom tin.
Melt butter. Put all ingredients into a food process and mix (a hand beater works just as well). Pour into tin. Bake for at least 50 min. Skewer to check.
Note: Times will vary when using recipe for cake pops :)